Notes
+ This tutorial assumes this is your 1st time opening Photoshop.+ This may seem long, but it's very easy! It's just lots of tiny steps
+ This is mostly aimed to make HQ gifs for Tumblr and similar, but works exactly the same for tiny gifs for your site and all. Just keep an eye on the filesize.
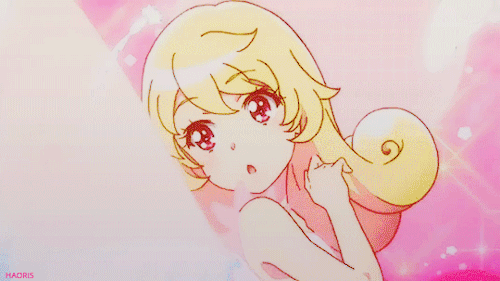
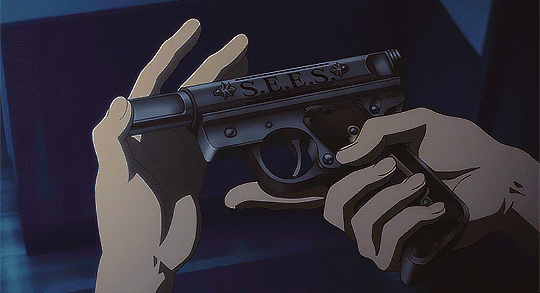
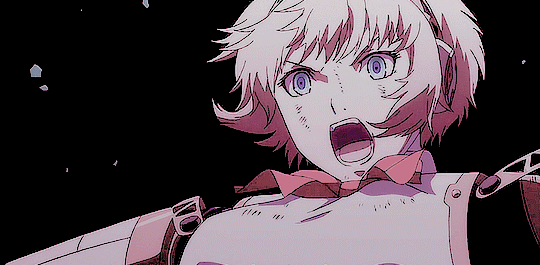
This is what we will be making:
1. Prep stuff
Why the Extended version version and not the Portable one? Because to make gifs, you will need the "video export" plugin, which the Portable lacks.
And, of course, the video you want to make a gif on. Here are some tips:
- Youtube: If the video you want is on youtube, congrats! You can use FLV retriever to safely download the video.
- Anime: Torrenting is your best friend(Nyaa is very good from what I have heard), but if you're like me and is scared to do it, I download the anime from Zoro
- Screen recording: If you can't find a way to download the video, you can try to record your own screen. Make the video occupy as much as your screen as possible and record, I use OBS studio, but being honest, I don't know how to use it lmao
- Trim your video If your video is long (+3 minutes), you should trim it. PS' video export timeline is very tiny, so it will make it hard to select the fragment you want. I trim with VLC Media Player, simply open the video, click the red circle button on top of the next/top/pause etc ones to start recording & click it again to stop. The video should be saved on you computer's "Video" folder
2. Open the video on PS
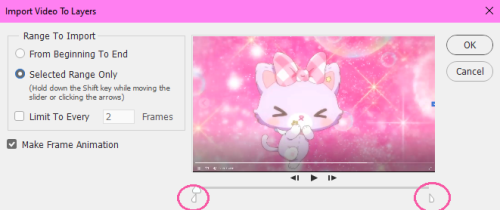
- If you want to make a gif of the whole vid, just click ‘[From beginning to end].
- If you want to only make a part, click [Selected range only] and slide the pointers I circled to select a part.
Keep [Limit to every (X) frames] unchecked, we will remove frames if necessary later.
Make sure [Make Frame Animation] is checked.
Click [Ok] & the video will open as layers.

This thing is called the Timeline. If it didn't appear at the bottom (usually) of your screen when you opened your video, click on [windows -> animation].
We need both Animation Timeline and Layers to make the gif.
3. Setting up the gif
Click on [Image -> Image Size].
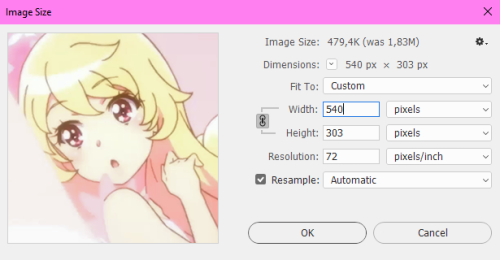
I chose 540px because that's the Tumblr photo size, but you can pick any size you want. For the sake of filesize, I would make it as small as you can.
*Note: It doesn't usually happen, but if when you opened your video the colors appear way darker or lighter than they are originally, click on [Edit -> Assign profile -> Don't color manage this document]. If this doesn't fix it, try the color profiles on the [Profile:]dropdown menu
Now that we resized our gif, it's time to delete frames if necessary. Go to the Animation Timeline at the bottom: most likely you ended up picking more of the vid than you wanted. Delete the extra frames at the start & end by clicking the little trash box icon at the bottom while the frame is selected.
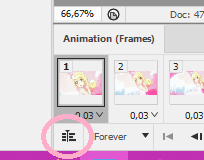
When you finish, click the left-most icon I circled.

If in the last step you deleted frames, go to [Layer -> Delete -> Hidden layers] to fully delete those frames.
Now, in order to be able to save it as a gif and give all the frames of the gif the same edits, we need to turn it into a Smart Layer. Click any frame in the timeline (or a layer in the layer window) & press CTRL+ALT+A to select every frame, then go to [Layer -> Smart Objects -> Convert to smart object] and...
That little icon on your Layer window indicates that these layers are now a smart object! If you notice, your timeline has only "one" layer now too, but don't worry PS just smashed all the frames into a folder so you can edit them all at once.
With all this done, your gif is ready to be saved, you can skip to 5. Saving the gif or continue below to make edits & color the gif.
4. Editing
Removing Jpeg artefacts
If you feel your gif has random blocks of colors and such, feel free to smooth things out.Simply go to [Filter -> Blur -> Surface blur] and play a bit with the settings. In general, it's best to leave both sliders below 10, or else it will smudge everything.
Sharpening
If you resized your image before, it's almost (almost) imperative that you sharpen it, especially if it's a 2D/anime gif, since resizing made the image more blurry.Select your smart layer (the only layer you have right now) on the Layer window. Go to [Filter -> Sharpen -> Smart sharpen]
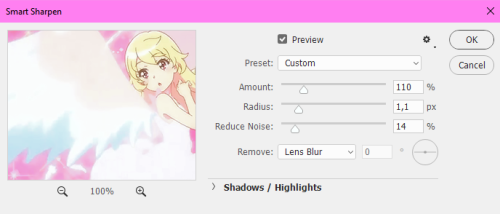
Set the sharpening to your liking. Click [Ok]
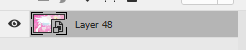
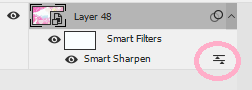
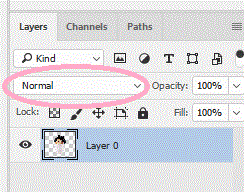
Then, double click here (in the layers window) & set the mode as "darken"
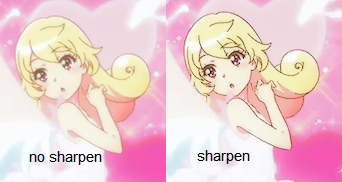
In this case, I had to sharpen twice here since the lines are colored & blurry, but in normal cases, just once works. It will make the black lineart much more black & clean. "Darken" helps to not overdo sharpening (it causes white lines to appear next to the lineart)
Now, to do what I said we should avoid... lately I have gotten a liking to over-sharpen my stuff lol.
I set [Amount] on the Smart Sharpen window real high, and then I leave it be, I don't set the filter on "Darken". The effect is this one, I think it looks good in some cases
Changing colors
Another very easy thing, just go to [Layer -> New adjustment layer] and pick any of them.Of course, you can still apply all the changes to the image directly ([Image -> Adjustments]), but making layers is more effective in this case since you can disable, open & edit them at any time, it's very flexible.
Adding Filters & more gifs/pics onto the image
"Filters" are usually called PSDs (Photoshop's image format) and are just a bunch of adjustment layers put inside a folder. When you put this folder onto another archive, the adjustment layers will affect it (and since it's just a layer, you can edit and disable them as much as you can).In any case, putting filters/psd and images onto your gif work the same. Open the image and simply drag it onto your gif's tab, wait a sec (until the tab changes) and drop the image on the workplace.

Now there are 2 layers on your timeline! And if you notice, the new layer is longer than your gif (in most cases). To fix that, just drag this grey grey to the end of your gif (like during video import, the sliders determine the gif's length)
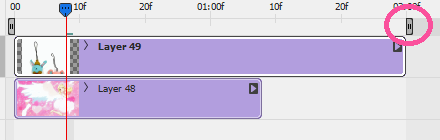
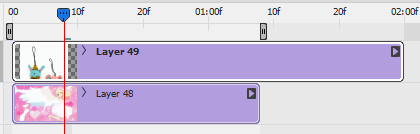
It should "snap" when it reaches the shorter layer. Of course you can manually shorten the image by dragging its rightmost border back, but again it's more convenient to use the sliders, especially if you have lots of layers.
If you want to put a gif instead of a single image or filter, you will need to make it a Smart filter first (steps 1-3 on here)! It has to be all grouped together to be able to move it.
With this you can do some stuff. For example, with Clipping masks you can make stamps with gifs inside them. Or you can also add effects for snow, falling petals, sparkles...
When adding those effects, layer modes are your best friends! You can find them here, on the layer tab
It a huuuge list, so feel free to experiment! A popular effect is to put snow over gifs, you can achieve this by looking up a snow gif/video with a pure black background & setting this layer to "Lighten" or "Overlay"! The black will disappear and only the white snow will show
5. Saving the gif
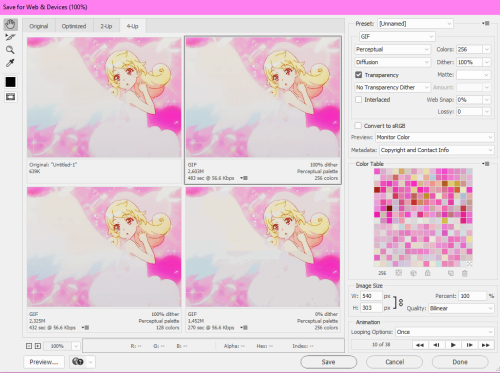
On the upper left corner is the original image (you can't save this one as a gif) & the others are gifs photoshop generates with different settings. It also indicates how much each pic weighs. If you don't want 4 images, you can change it on the tabs at the top.
I won't explain everything in detail, but the settings here are the color & compression settings:
- Perceptual (and the others): Refers to how Photoshop picks the colors of the gif (since gifs only are able to hold 256 colors)
- Diffusion (and the others): Refers to how the colors blend with each other
- Dither - Refers to how much colors blend. More dither = bigger file size (in most cases). If your gif only has plain colors, feel free to leave it at 0%
- Colors - The max number of colors on the gif
- Interlaced - How the gif loads in the web (blurry to hq // hq from the start but it loads from top to bottom like a curtain). Doesn't do much, but i like to leave it unchecked (blurry to hq)
- Transparency - When checked, it gives the gif transparency instead of a solid color background. Useful for sprites and stamps.
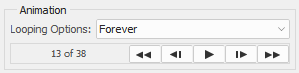
And finally, time to save your gif! Make sure Looping Option is set to [Forever], it's set at "Once" by default!
Now you can click [Save] and close Photoshop!!
"Done" doesnt save the gif, it just saves the settings i mentioned before)
That's all! I hope it was useful! 💕 If you have any questions or I made a mistake, you can ask me!